Getting Started
We've had several customers ask us how to install solenoids to control their Gimbel Automation CNC Spindle Gripper or their Gimbel Automation Air Vises. This article is written to guide you through the process of installing a solenoid on your Haas CNC Machine to control external add-on products.
Where On the Board Do I Wire? Do I Need Relays?
For modern Haas mills, you are going to use the M22 through M26 relays on the Main IO Board, that correspond with a standard set of M-code commands. Haas has their own guide (which is, admittedly, quite hard to follow).
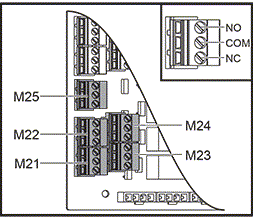
You can see the area on the board we're referring to above. The M21-M26 Relay Inputs are Phoenix-Style connectors on the bottom-left of the Main IO Board, and are what the diagram from Haas shown above labels.
Unfortunately, Haas has become greedier over the years, peppering its customers with unnecessary options and extra required purchases. One example of this is that on last few years' of Haas's production, they make you purchase the relays as an insertable add-on for $174.95. We sell an identical kit here on our site for only $109.00. The relays are identical to the ones Haas sells (same brand and part number).
You'll know that you'll need to purchase a Haas-Compatible Relay Kit from us if your machine board looks like this:

If your board has these relays already populated, you won't need to buy them from us or from Haas! If not, insert the components from our kit so your board looks like this:

The Solenoids
Now you need to know what kind of Solenoid to select. While these relays can support up to 120V AC, we highly recommend against using AC Mains voltage for controlling solenoids, since AC so near the main I/O board can cause electrical interference issues. Instead, you should use a 12V source. Note that you will have to provide the 12V source (the I/O Board won't do it for you)
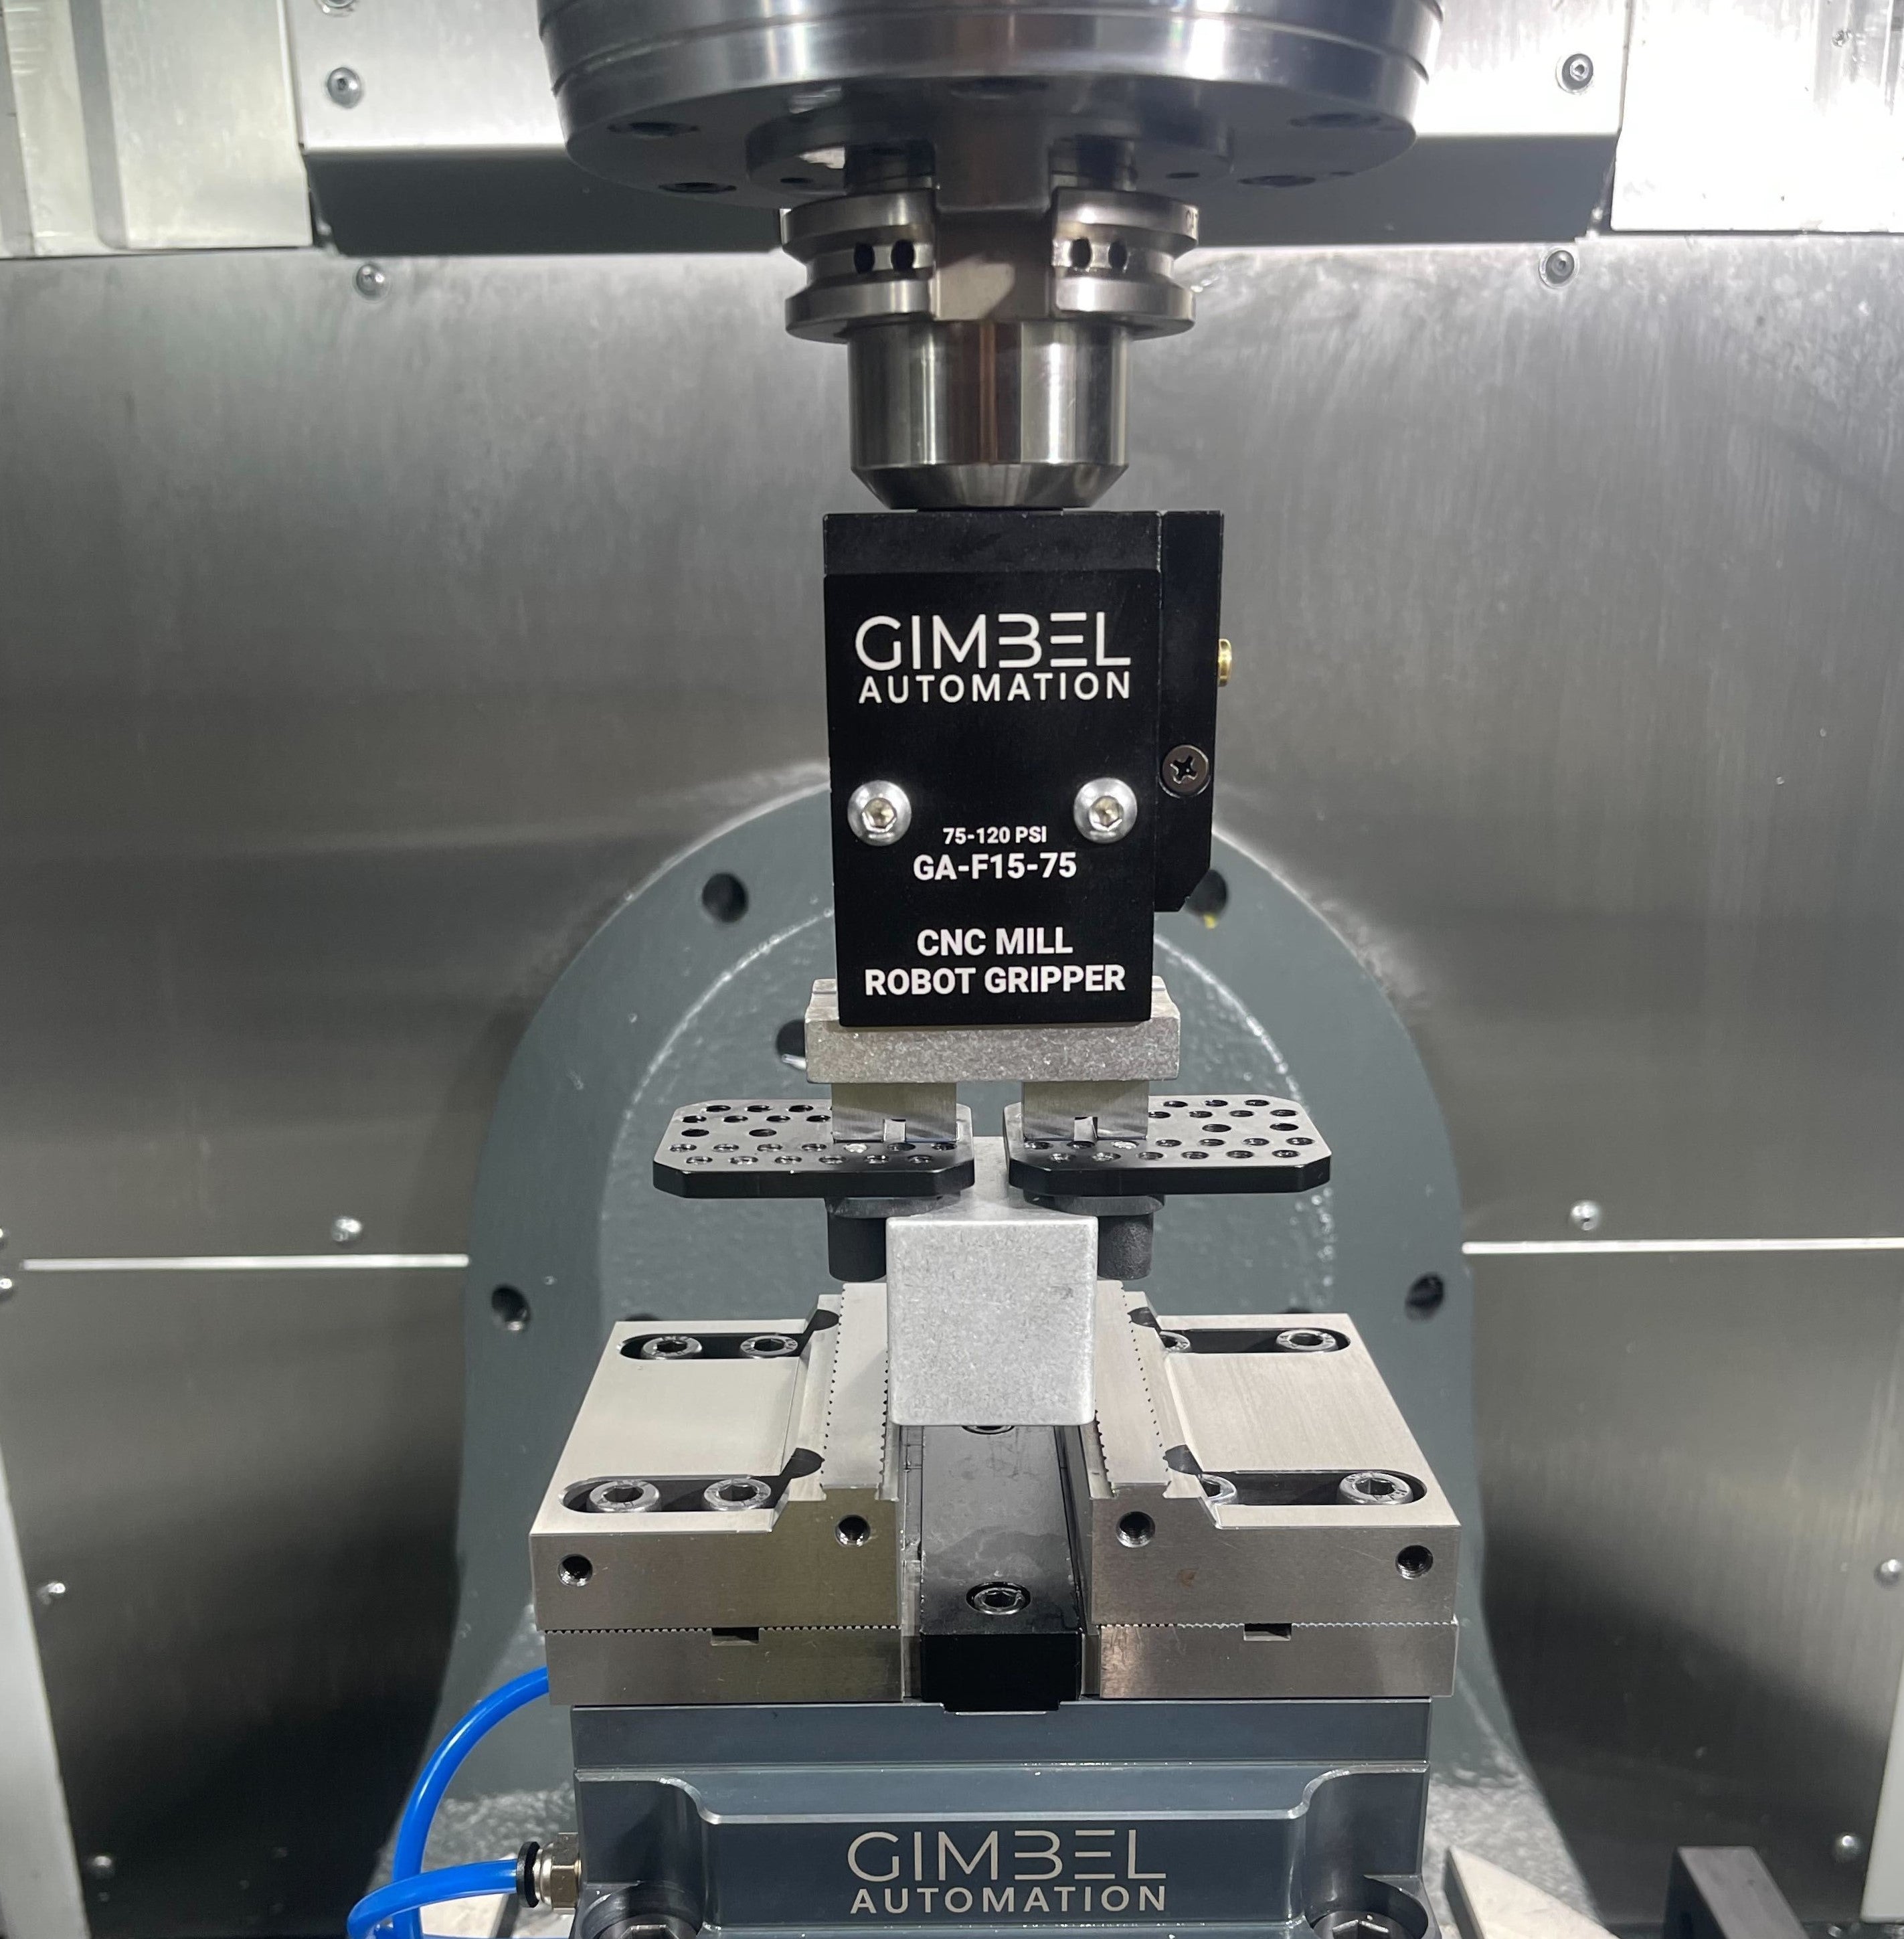
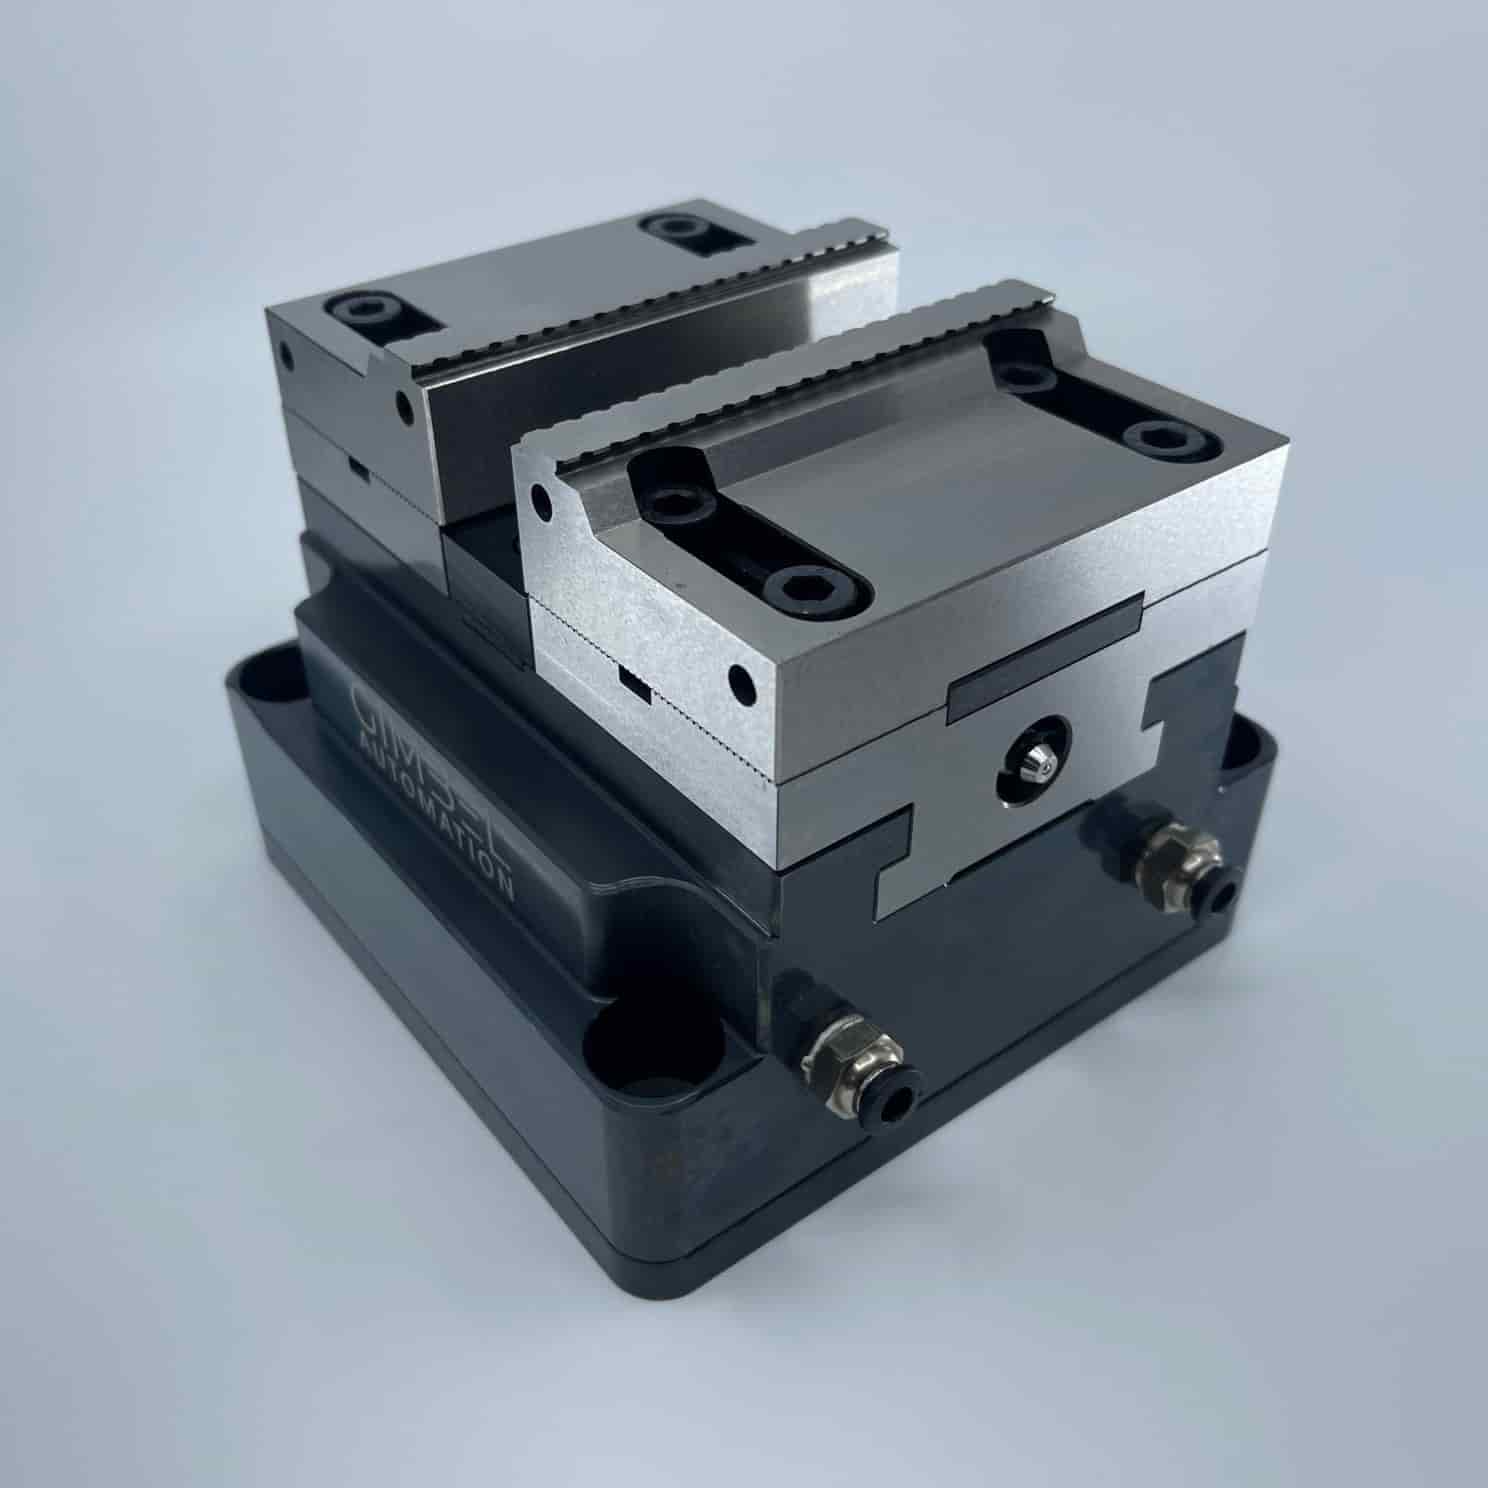
We generally recommend a two-way solenoid, even though it isn't always required. For instance, our Haas-Compatible Bypass Models of Spindle Grippers only require a standard On/Off Solenoid.
You can choose between an Generic or Industrial Solenoid. While Industrial solenoids are less likely to fail over time, we have plenty of customers that have hundreds of thousands of cycles on generic two-way solenoids.
A good example of a generic 12V two-way solenoid can be found here.

Ensure that your solenoid has 1/4NPT ports for the air fittings. To interface with your Haas equipment, we recommend using 1/4NPT to 1/4" Push-to-Connect fittings. Be careful with Amazon fittings, since it's common for sellers to sale cheaper 6mm Air Fittings as 1/4" ones. Instead, we recommend buying these ones from McMaster-Carr here. We like these ones because they have rubber seals, so you don't need to worry about Teflon tape or sealing liquids.
Thread the the three 1/4" NPT Push-To-Connect Fittings into the three 1/4" NPT holes until the rubber seals.
One two ports that are on the same side are the Outputs (Exit Ports). This is where air will come out. In the off state, one of these will have air pressure, and one of them wont. When the solenoid is powered on by the machine's relay, the state will invert, such that the pressurized and unpressurized ports swap.

The Air Inlet is where you will plumb in air for your system. We recommend installing another one of the 1/4" NPT Fittings linked earlier and installing it into your Haas Air Panel's Distribution Air Block. Then plumb 1/4" Hard Plastic Air Line between the port you installed and the inlet on the Solenoid.

The Wiring
Now looping back to the part that makes many of us machinists cringe: the electrical wiring; luckily, this is actually super easy to implement. Think of a solenoid as just a switch that completes a circuit. When that circuit is on, the solenoid will become powered and invert the pressurized Output port.
So how do we accomplish this? The easiest way is to buy a 12V DC Power Brick like this one, and use the power distribution Terminal shown below:

Then, the positive terminal of that Green Terminal Adapter will be wired into your solenoid (don't worry about the polarity, unless your solenoid has an indicator LED). The Negative Terminal of the Adapter needs to be wired into the Common (Middle) Port of one of the labeled M21-M26 Ports shown below:

Note: We recommend using M21, M22, and M25 relays before the other two, as the M23 and M24 relays are harder to implement due to Haas building their newer machines for easier robot integration with MFIN (don't worry about MFIN unless you need to add sensors later on).
Now, the last connection you need to make is to wire the negative wire of your 12V solenoid into the "NO", or Normally Open, relay terminal. Make sure to use the same terminal you just wired the Common into. Now, when the relay is connected, the Ground is connected and the relay becomes powered! For an Air Vise or other system that needs two ports for air, just plumb the air into your device. For devices that need just one port, such as our Bypass Model Spindle Grippers, you just need to plug the side of the port that is pressurized when the solenoid doesn't have power using a 1/4" NPT plug.
That's it! You're ready to start running fully-automated production.